PostgreSQL table
Like all SQL databases, the PgSQL databases are organized in tables too. The tables in Postgre are separated in columns and rows, just like an ordinary table. The columns store the different categories of records in the table whereas the rows contain the information itself.
Managing PostgreSQL tables via the command line
PostgreSQL offers two ways of managing its tables. The first one is via the command line interface, which can be accessed by a terminal client like Putty for Windows, or by a Linux terminal. This can seem a bit complicated at first, but it's actually not that hard, since the syntax used by the SQL language is fairly simple and logical, as it can be seen in the examples below.
An example of How to Create a Table in PostgreSQL
CREATE TABLE phonebook(phone VARCHAR(32), firstname VARCHAR(32), lastname VARCHAR(32), address VARCHAR(64));This will create a table named ‘phonebook’ with 4 columns: phone, firstname, lastname and address.
Once we have created the table, it's time to insert some information in it.
An example of how to Insert data into a PostgreSQL table
INSERT INTO phonebook(phone, firstname, lastname, address) VALUES('+1 123 456 7890', 'John', 'Doe', 'North America');The command above will insert the values in the respective columns of the table. Once the information is there, we can start manipulating and using it. Below you will see several examples of how to select data from the table, how to update and delete it.
An example of how to Select data from PostgreSQL table (1)
SELECT * FROM phonebook ORDER BY lastname; (returns all data for lastname)An example of how to Select data from PostgreSQL table (2)
SELECT * FROM phonebook WHERE lastname = 'Doe'; (returns all data for Doe as a family name)An example of how to Select data from PostgreSQL table (3)
SELECT * FROM phonebook WHERE firstname = 'John' AND lastname = 'Doe'; (returns all data for the first and the last name)An example of how to Update data in PostgreSQL database
UPDATE phonebook SET address = 'North America', phone = '+1 123 456 7890' WHERE firstname = 'John' AND lastname = 'Doe'; (updates the address and the telephone number of all persons named John Doe)An example of How to Delete information from a Table in PostgreSQL
DELETE FROM phonebook WHERE WHERE firstname = 'John' AND lastname = 'Doe'; (deletes all data for John Doe)Another advantage of the command line interface is its speed. Since you are not using a graphical interface, your connection to the server is much faster and you can see the result of your command immediately.
Managing PostgreSQL tables via the phpPgAdmin interface
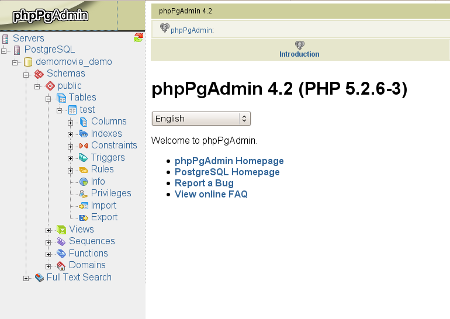
For those users who prefer a graphical interface, there are several tools available, but the most popular one is the phpPgAdmin interface. It is designed after the famous phpMyAdmin tool, which is used for MySQL database management purposes.
With NTC Hosting, you can easily access the phpPgAdmin tool from the "PostgreSQL Databases" menu in the Web Hosting Control Panel. As soon as you create your Postgre database, you will see the phpPgAdmin icon next to the database name.

Click on it to start managing your database. This will lead you to the phpPgAdmin itself. It will allow you to use all the features of the powerful command line management through a simple web interface. This will help all of our users, who are not used to working with a command line and prefer a graphical interface.
How to create a table with the phpPgAdmin
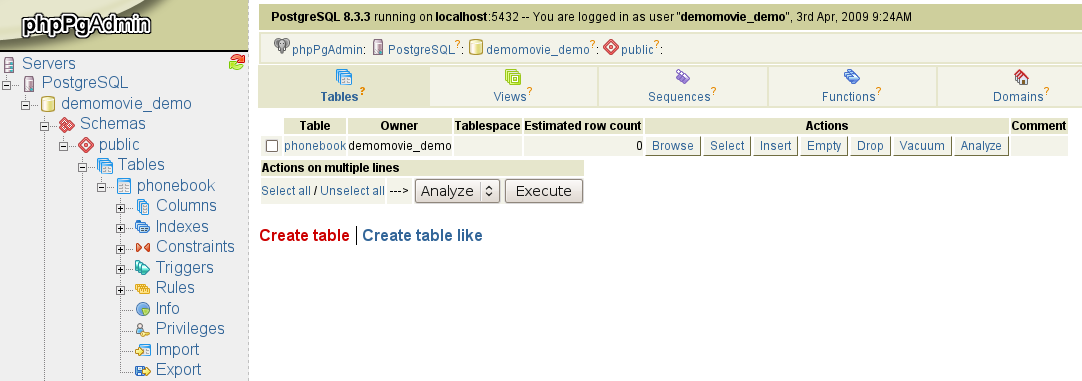
Through the phpPgAdmin you can easily manage existing or create new tables. It sports a wizard-like approach to almost all the actions, otherwise accessible only via the command line.

To create a table with the phpPgAdmin, all you have to do is follow the table creation wizard - choose a name for the table, specify the number of columns it should have and enter an optional comment. In the next step, you will have to specify the type of data which will be entered in the columns. You have a wide selection of options for the specific data type.

And your new table is ready. You can start working with it at any time.
PostgreSQL table manipulations with PHP
Just like MySQL, PostgreSQL supports almost every programming language and most of all, PHP. In PHP, there are two ways to announce a connection to a PostgreSQL database - using the pg_connect() and pg_pconnect() commands.
PHP-PostgreSQL connection with pg_pconnect
<?php$connection = pg_pconnect("dbname= my_database user=myuser host=localhost");
?>
In this example, if the connection fails, a "Connection Failed" message will be shown. If the connection is successful, the query will be executed.
Create and Drop a PostgreSQL table in PHP
You can easily create a PostgreSQL table with the help of a PHP script.
How to create a PostgreSQL table in PHP
<?php$PGCON = pg_connect(dbname="mydb" user="me" password="mypassword");
$query_string = <<<EOT
CREATE TABLE demo (
id varchar(5),
name varchar(20),
middle varchar(20),
)
EOT;
pg_query($PGCON,$query_string);
pg_close($PGCON);
?>
The above script will create a table named "demo", which has 3 columns - id, name and middle. You can also use a PHP script to delete a PostgreSQL table.
How to Drop a PostgreSQL table in PHP
<?php$PGCON = pg_connect(dbname="mydb" user="me" password="mypassword");
$query_string = "DROP TABLE demo";
pg_query($PGCON,$query_string);
?>
PostgreSQL with NTC Hosting
With NTC Hosting, you can easily manage PostgreSQL tables via the command line, if you have activated it as a service, as well as via the phpPgAdmin interface included in each of our web hosting plans or via a script written in PHP, Perl, or Python. PostgreSQL databases will give you all the advantages of a corporate database solution, but in the form of an open source database package.
Resources: